Integrating with HubSpot

Anwar Choudhury
•
May 6, 2025

How to Integrate HubSpot with Warmcal
The HubSpot integration keeps your HubSpot CRM up to date by automatically syncing meetings booked through Warmcal to your HubSpot records.
What is Warmcal.com?
Warmcal lets you personalize your booking page to build trust and credibility, helping you book more meetings. Integrated with HubSpot CRM, it effortlessly updates your meeting details, contact information, and assigns each meeting to its owner.
We make it easy to add social proof, intro videos, images, and more so you can warm up leads before the call even begins.
What’s more? With Warmcal, embedding a beautiful, personalized calendar on your website takes just one line of code. No special tools or developers needed — just copy and paste!
Our HubSpot Integration
Creates contact if email doesn’t exist
Updates contact if email exists
Logs meeting with details (start/end time, duration, link, host, type)
Assigns contact/meeting owner in HubSpot (for Round Robin)
TL;DR
Create a Warmcal account and personalize it
Go to Integrations and connect HubSpot
Share your meeting links
Every booked meeting will auto-update your HubSpot CRM
Great! Your website is now ready to warm up prospects, book more meetings, and seamlessly update your HubSpot CRM 💪
How to integrate Warmcal with HubSpot CRM
Start your free trial for warmcal.com and create your personalized calendar with social proofs, videos, images and more.
Step 1. After registering, visit the dashboard and click your profile picture in the top-right corner to open the dropdown menu.
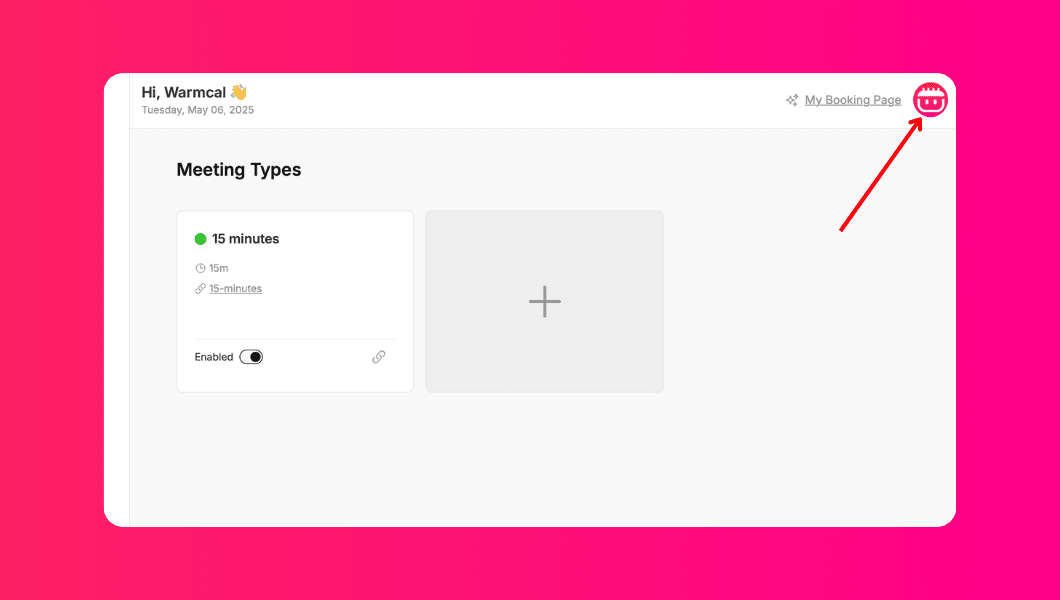
Step 2: From the dropdown, select “Integrations”
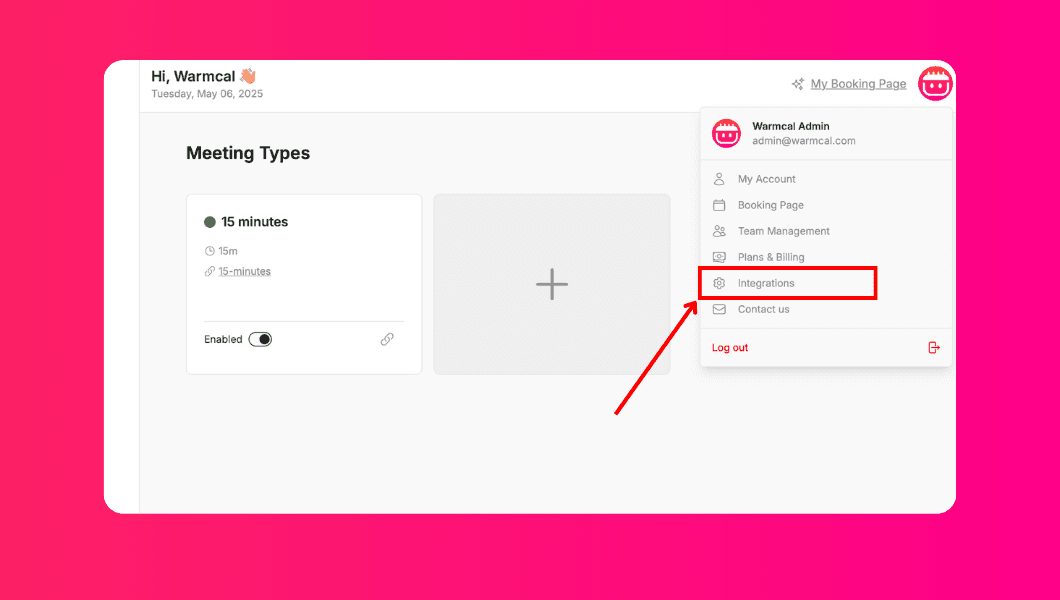
Step 3: Find and click on HubSpot in the integrations list.
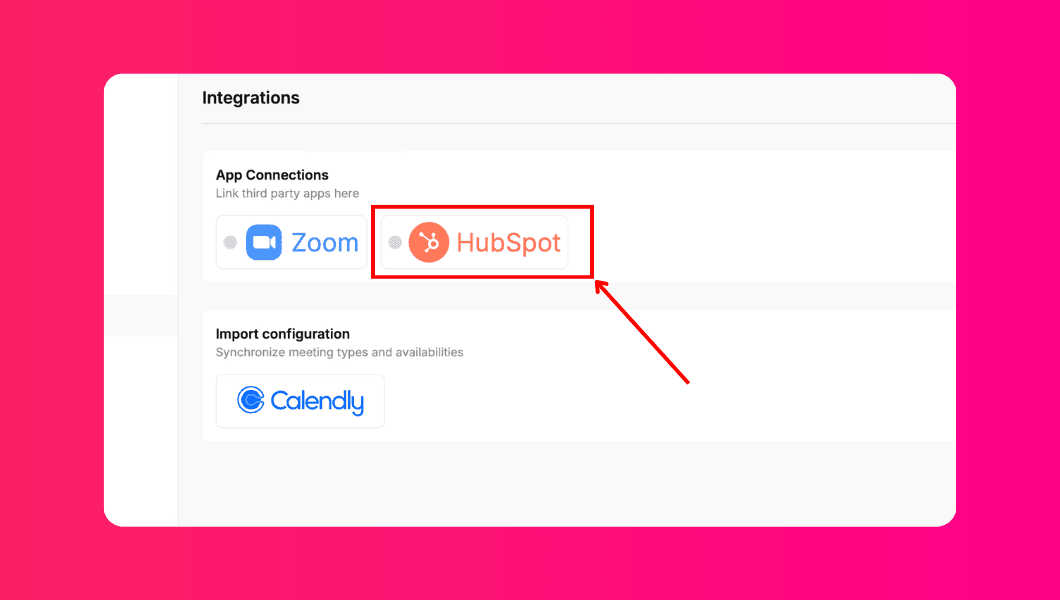
Step 4: A HubSpot login window will pop up. Sign into your HubSpot account, or create a new one if needed.
💡Tip: If the HubSpot login popup is blocked, check your browser's pop-up settings and allow them for Warmcal.

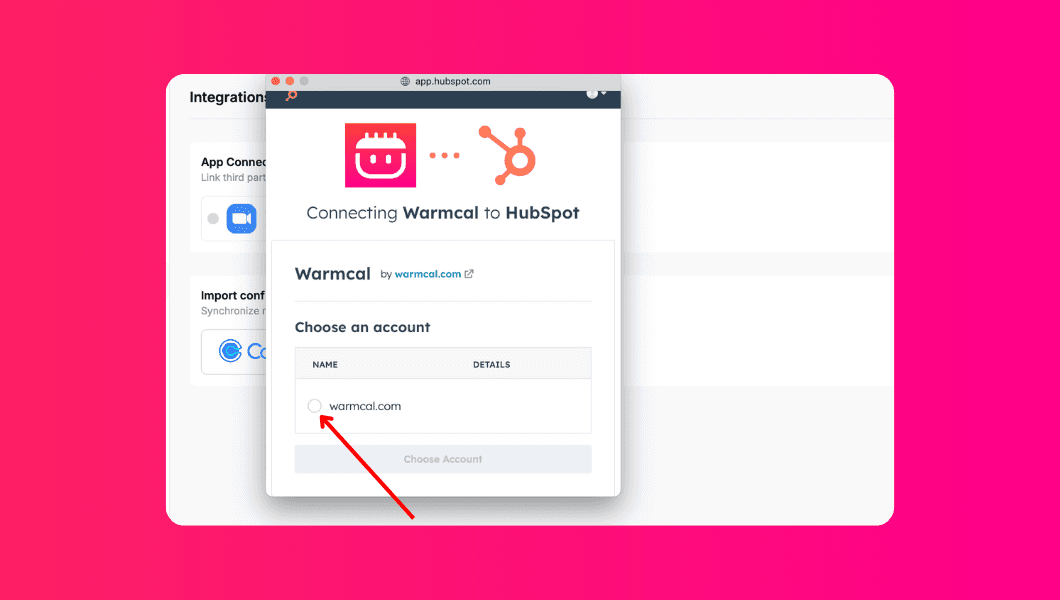
Step 5: Choose the HubSpot account you'd like to connect and click “Choose account”
Step 6. Review the access permissions and then click “Connect App”
💡 Tip: Warmcal only requests the minimum access needed to sync your meetings — you remain in full control of your data.

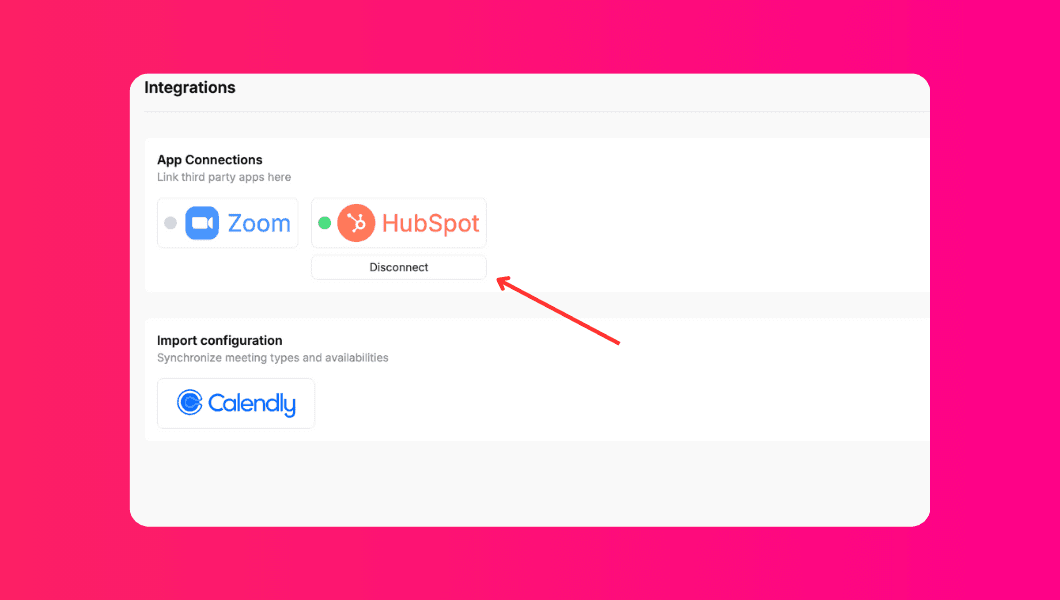
Step 7. That’s it! 🎉 Warmcal is now connected to your HubSpot account. You can disconnect anytime by returning to the integrations page and clicking “Disconnect.”
💡 Tip: You can always switch HubSpot accounts later by disconnecting and repeating this process.
How to Integrate HubSpot with Warmcal
The HubSpot integration keeps your HubSpot CRM up to date by automatically syncing meetings booked through Warmcal to your HubSpot records.
What is Warmcal.com?
Warmcal lets you personalize your booking page to build trust and credibility, helping you book more meetings. Integrated with HubSpot CRM, it effortlessly updates your meeting details, contact information, and assigns each meeting to its owner.
We make it easy to add social proof, intro videos, images, and more so you can warm up leads before the call even begins.
What’s more? With Warmcal, embedding a beautiful, personalized calendar on your website takes just one line of code. No special tools or developers needed — just copy and paste!
Our HubSpot Integration
Creates contact if email doesn’t exist
Updates contact if email exists
Logs meeting with details (start/end time, duration, link, host, type)
Assigns contact/meeting owner in HubSpot (for Round Robin)
TL;DR
Create a Warmcal account and personalize it
Go to Integrations and connect HubSpot
Share your meeting links
Every booked meeting will auto-update your HubSpot CRM
Great! Your website is now ready to warm up prospects, book more meetings, and seamlessly update your HubSpot CRM 💪
How to integrate Warmcal with HubSpot CRM
Start your free trial for warmcal.com and create your personalized calendar with social proofs, videos, images and more.
Step 1. After registering, visit the dashboard and click your profile picture in the top-right corner to open the dropdown menu.
Step 2: From the dropdown, select “Integrations”
Step 3: Find and click on HubSpot in the integrations list.
Step 4: A HubSpot login window will pop up. Sign into your HubSpot account, or create a new one if needed.
💡Tip: If the HubSpot login popup is blocked, check your browser's pop-up settings and allow them for Warmcal.
Step 5: Choose the HubSpot account you'd like to connect and click “Choose account”
Step 6. Review the access permissions and then click “Connect App”
💡 Tip: Warmcal only requests the minimum access needed to sync your meetings — you remain in full control of your data.
Step 7. That’s it! 🎉 Warmcal is now connected to your HubSpot account. You can disconnect anytime by returning to the integrations page and clicking “Disconnect.”
💡 Tip: You can always switch HubSpot accounts later by disconnecting and repeating this process.
Create your booking page in minutes.
Start booking warmer meetings today.
Create your booking page in minutes.
Start booking warmer meetings today.

Warmcal
Booking pages built for trust, credibility and first-time sales conversations.
Warmcal
Booking pages built for trust, credibility and first-time sales conversations.
Warmcal
Booking pages built for trust, credibility and first-time sales conversations.